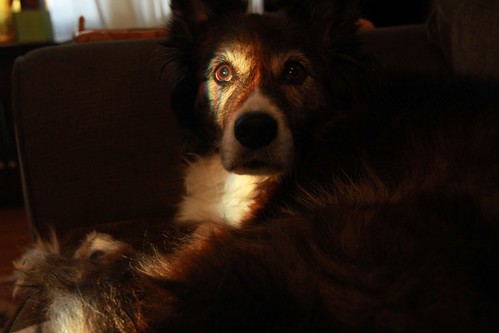
(I ate all of our eggs, so... Photo by avlxyz )
I'm very excited to share with you today a new technique I learned by watching Chef Michael Simon. The technique was included on The Chew the other day, as part of a recipe he calls "Moons Over Cleveland" - a take on the "Moons Over My Hammy" sandwich from Denny's. The show was all about comfort food/American style restaurant favorites made at home. Anyway, the sandwich, yeah, looks fine, but THE EGGS. Oh my. I don't even love scrambled eggs that much and I know why...because I was never cooking them like this!
For just a single serving, I use:
-2 eggs (organic please! seriously)
-approx. 1 tablespoon salted butter + a little extra if you want (use organic/grass fed!)
-spatula
-small saucepan
Crack the eggs into a cool, non-stick saucepot and mix with a spatula. Add 2 tablespoons of butter to the pot. Place pot over a medium-high heat and stir continuously, taking the pan on and off the heat, until the eggs are creamy and scrambled. Season with salt and pepper.
Be sure not to overcook the eggs, but this technique helps prevent that better than in a skillet. I guess it's the constant stirring and the on-and-off the heat source (plus the butter) that keeps the amazing texture. Also, never add salt to your eggs prior to cooking. It apparently dries them out and then you get even drier scrambled eggs. Add seasoning at the end. Lastly, there's no cream or cheese in these. You don't need it! So they're 'healthier' (a little GOOD butter does NOT hurt you!)
I hope you'll try these. They are superbly delicious. I think they would be easy to make up in larger batches, too. Maybe 6 eggs at-a-time max though for even cooking.
This morning I had mine with cinnamon toast (even gluten-free bread tastes good toasted with cinnamon & sugar!)
Happy Breakfast!
Wednesday, January 23, 2013
Sunday, January 20, 2013
a little before and after for your Sunday
We're repurposing this dresser from our bedroom furniture for the nursery. Mostly, because it doesn't fit in our bedroom and has lived in what will be the nursery since we moved to Portland, but it's great storage and will be nice to have for all of Baby Bird's stuff. It was so dark though, so I, 6 months pregnant, undertook the task of painting it white. I will not be doing this for a living, EVER, but I think it turned out great :)
Before...
Before...
After!
It's so much lighter and makes the entire room feel that way. It was quite a project, but not too bad if you're not in a hurry. I took my time and just did what I could over the course of a week and a half. Listening to a Harry Potter audio book also helped (highly recommended).
I did a light sand first, then painted 2-3 coats of a white eggshell finish interior wall paint using a Shur-Line edger, which was FABULOUS! My stepmom does a lot of refinishing and suggested it. It really works well for the flat surfaces...good coverage and very few brush marks. I finished with 2 coats of polyurethane and let that cure for 24 hours before putting it back together. It was quite a task, but I'm SO glad I did it. It totally changes the feel of the nursery.
We had a lovely babymoon on Thursday and Friday and purchased our crib on the way home. Woo! We went with Sundvik crib from Ikea in white. It adjusts heights of the mattress, of course, and also converts to a toddler bed, which is great. My friend Jane has it for her little man and loves it.
The only piece of furniture we still need for the room is a changing table. They have a decent one at Ikea, but I'm going to see if I can find a vintage dresser first. I'm thinking I'll add some wooden trim to the top or something to which to secure a changing pad. I've been collecting great artwork prints, too, and can't wait to get them on the wall. Daddy has to put together the crib first :)
Saturday, January 19, 2013
bear claw blanket decisions...
Happy Saturday! I'll soon be posting an update from our lovely babymoon trip to Timberline Lodge on Mt. Hood, but first, I need your input.
I've gathered a bunch of the Koigu I have (yes, used to be addicted to it), some Louet Gems in pale grey for the background color (purchased a bag of it at Stitches South a few years ago) and worked some graphic designer magic in Illustrator this morning to put it all together into a blanket design, with 2 options.
The pattern is the Bear Claw Blanket by Veronik Avery, from Interweave Knits Spring 2005. I have adored this blanket forever and am so excited to start. Here are my 2 design options:
I love them both! Right now I'm deciding between the gold or red center square color. I will later on choose a border color, as well, but feel free to leave input on that option, too. Let me know what you think! Here is a photo of the original finished blanket from the pattern. I had so many different colors of Koigu that I decided to save a little $ and make different colored squares instead of following the pattern. I would've had to buy so much yarn! I'm excited about my thriftiness and that the design worked out lovely with what I already had :)
Thanks for your votes! We'll see what happens...
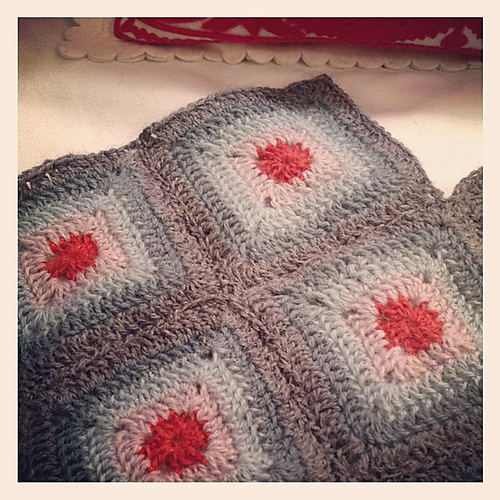
UPDATE: Also making this, remember, so I must be slightly obsessed with red-orange square centers...
Wednesday, January 16, 2013
Top 11 Pregnancy Must-haves
So, instead of relying on my memory (that is already fuzzy) in a few more months, I thought, as I approach 6 months this weekend, I'd compile a list now of things I've REALLY needed thus far during my pregnancy. I hope this list is helpful to some. Everyone has suggestions for you, but these are the things I definitely want to remember next time.
In no particular order:
-stretchy bras - don't even try to find the perfect sized underwire bra. You will most likely have to sleep in a bra EVERY night, so just buy comfy, stretchy bras that you can sleep in and later nurse in. Gap Body makes some nice ones, as do many companies. The material I'm talking about feels like thick tights. Sometimes for extra support I wear two at a time (ie. during yoga). Trust me, these are comfy around your rib cage and that's so key!
-maternity ribbed tanks, knit tees and long sleeved tees - I bought all of mine from Old Navy and I live in them. I actually need more tanks. You can wear the tanks under everything, even pre-pregnancy shirts. I bought V-neck and scoop neck knit shirts that are fitted. They are cute, inexpensive and the most comfortable things I own. You don't have to break the bank on these and they don't really look 'maternity-like.'
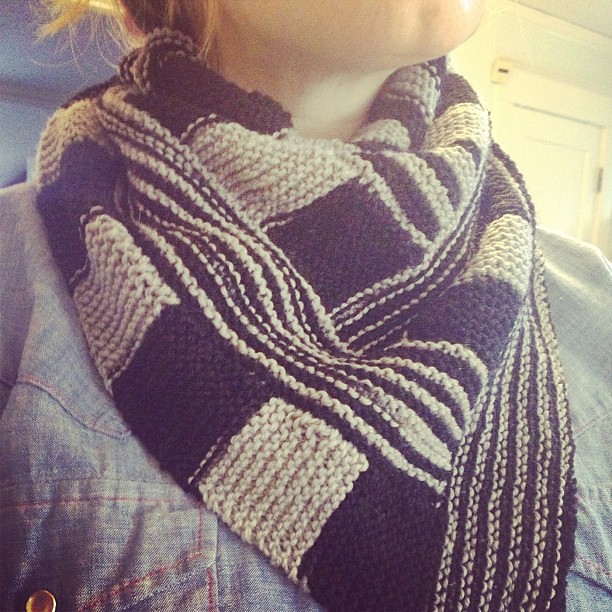
-fun, bold accessories - I knitted this black and grey scarf and it really adds something special and modern to a plain outfit. It's hard to be super fashionable while pregnant without spending some money, but accessories are totally the way to go. You can jazz up your plain knit tops with a cool scarf or cute knitted hat.
-American Apparel high-waist leggings - I loved these pre-pregnancy and they are amazing for maternity leggings. They are a little pricey at $30, but they're definitely worth the bucks. The waist band really is comfortable AND actually holds them up. I haven't had this luck with other maternity leggings or low rise leggings (which are really annoying to me right now). I'll let you know how they work when I'm bigger than 6 months, but for now, they are my favorite pants ever.
-long cardigans, sweaters, or vests - like the one above. These are really helpful to hide the lines that tights, belly bands, high waist leggings, etc. might give you under your dresses and fitted tunic tops. I have an oversized brown cardigan from H&M that I wear all of the time. Vests are nice if it's not super cold or if you have a light dress like I'm wearing in the picture. Plus, the layering look is always cute to make an outfit a little more interesting.
-splurge on an awesome pair of shoes - I LOVE shoes. No, I really really love buying shoes, but I tend to find sales and not spend too terribly much per pair to justify to myself all of my purchases. I'm learning though that a nice pair of shoes is worth it, so I splurged on these Hasbeen boots. You will probably start to feel a little plain and big and unexciting, so if you like shoes, buy a fun pair. Be sure not to get them too tight because a) that would just be annoying right now and b) your feet may widen or grow a little bit from pregnancy. I've heard that wearing supportive shoes most of the time will help prevent this though (not flip flops!). These shoes make me feel super fancy and a little bit cooler each time I wear them. They're worth it. (I did find them on sale though, so you can be proud, mom).
-cinnamon toothpaste - is your friend. Mint has NOT sounded good to me at all while pregnant, but you surely don't want to neglect your teeth. While Close-Up is probably not the most amazing, new, updated toothpaste out there, it still has fluoride and protects your teeth...and doesn't make me gag :)
-prenatal yoga - do it. Seriously, it feels amazing to stretch out and know you're building some strength up for labor. I'm just doing a once a week class, but it's been really great so far.
-Zypan (for digestion) - this is a natural supplement (from Standard Process) that aids in digestion. Seriously, it helps. My naturopath has recommended it at every visit. Of course, check the ingredients before you take them and ask your doctor. I'm not a doctor! But it is a natural supplement. Take at least one with each meal. Also, Calcium/Magnesium powder helps if you get a little stopped up. Take as directed on the bottle. It tastes kind funky, but it's lemony, so not too bad. And it really helps...I love that it's natural, as well.
Vitamin E Oil from Trader Joe's - It's only $3-something per bottle and has been recommended to me as the best thing to prevent stretch marks. You can tell it's good because of the thickness of the oil. So far so good as far as stretch marks go and I think this has something to do with it. (I know, it's mostly genetic and I'm not done with my pregnancy yet, but it definitely can't hurt to keep slathering this on!)
Prenatal massage - I had one yesterday and it was one of the most relaxing things ever. I've had a fair amount of massages, but I was really able to relax yesterday. She did the sideline method (yep, you lie on your side). Save up for a couple of these during pregnancy. Not only is it really relaxing, but you can justify it to your pocketbook by knowing that it definitely helps with circulation.
And here are a few things that really helped me when I felt so icky during the first trimester:
-lemons in your water - essential
-eating small amounts throughout the day - seriously helpful - raw trail mixes were superb, healthy, and protein-packed
-naps - oh boy, did I ever nap
-bacon - It always sounds good, but I seriously craved it. Maybe not helpful for you, but I wanted it on the list :)
-cinnamon toothpaste - I know, already on the list. It was really essential in the first few months. Cinnamon Altoids, too. So helpful.
I hope some of these things will be of use to you. Let me know if you have any must-haves for pregnancy!
Saturday, January 12, 2013
January 11, 2013
Yesterday, Mattie did her best Bowie. Thankfully, I caught it on camera.
Thursday, January 10, 2013
tips for unkinking and reusing yarn
So, sometimes project don't turn out as well as you think they will. This seems especially true with sweaters. Even after having made quite a few, things happen during knitting that just don't line up with creating a well-fitting masterpiece. This happened to me with this sweater.
I'm so thrilled to have this yarn again. Try it out, won't you? Send me what you decide to knit with your repurposed yarn!
Maybe it's cute at first glance, but the raglan increases were a bit messed up and that. yarn. It's lovely yarn from Quince Co. called "Puffin," but it's SO heavy. I think you need to live in Scandinavia for it to be useful. Even here in Portland where it stays pretty cool all of the time I don't need super duper bulky sweaters. Plus, bulky is rarely flattering.
Anyway, being a responsible knitter (ha!) I vowed I would take this out so I could reuse the yarn for something different, like a blanket. Bulky yarn is great for blankets - they knit up quickly and they don't have to flatter :)
Maybe it's the pregnancy hormones or maybe I didn't eat enough breakfast or something, but I actually got around to ripping this out this morning!! Here are the steps I took and maybe they'll help you out.
What you need:
-a hand-knit sweater you never wear (or a thrifted hand-knit sweater would be great, too!)
-crochet hook (helpful for taking out the woven-in ends)
-yarn swift (or back of a wood chair would work ok)
-clothes steamer
-something to steam upon - like the pad that may have come with your steamer, an ironing board, etc.
-hooks or clips
-filtered water
1. Using your crochet hook and hopefully remembering how you knit your sweater to begin with, start taking out the woven ends where you bound off for your project. For me, this was the bottom of the sweater, because it was knit top-down. Of course, if you are doing this to a thrifted sweater it may take a little time to figure out. Bulky yarn projects are great and are easy to see the ends :) *Turn on your steamer now so it heats up before you need it later.
2. As you CAREFULLY pull out the stitches, wind the yarn around your yarn swift or the back of the wooden chair.
This will begin to help unkink the yarn, but only a bit. It's mostly helpful because you need the yarn in skeins, rather than in wound balls.
3. Once you've finished one skein of yarn, tie each loose end around the skein to secure. Remove the skein carefully from the swift. Kinky!!
You can see that this might not look awesome when you go to reknit it, so you'll want to steam out those kinks. Many tutorials I've seen before suggest hanging it in the bathroom and turning the hot shower on. Not only do I think this would take FOREVER, but it also wastes a ton of hot water. Of course, if you don't have a clothes steamer, this could be a good option for you. Do what you have to do to save that lovely yarn.
4. Place your skein on a hook or with clips onto your steaming surface. My Shark steamer came with this handy steaming pad that not only hangs on the door, but has a hook at the top. I'm sure you could fashion something similar with a towel and some chip clips :)
5. Steam the yarn with the steamer, while either clipping the bottom of the skein or pulling it with your free hand. You might find holding it is easier so you can turn the skein over a bit while steaming. Don't worry, as long as you don't rub around on the yarn, it shouldn't felt. Felting is due more to agitation rather than just hot water. *Disclaimer: Just use caution! If you are a flamboyant steamer you may want to take it a bit easy...
6. Replace the steamed skein onto your yarn swift. Let it dry here. You could also leave a skein clipped tightly on your steaming surface, to take care of two at once. Because I didn't get my yarn that wet, mine only needed to dry for an hour or so. If yours gets very damp, leave it overnight. Or, you may get really nice results if you leave it longer regardless. I couldn't wait to steam more skeins :)
7. After it's dry, remove the skein, twist it a few times as you hold both ends and then let it twist over on itself. Tuck one end in the other. Yes, I worked at a yarn shop and you learn this pretty much on your first day. Helpful to know! Voila! You have 'brand new yarn!'
8. Go peruse Ravelry for projects to make with your revived yarn. This is the most fun!
Here are some I may use mine for:
Chouette (this was already in my queue!)
Franchement's Last Minute Slouch Hat
Brickstreet blanket by the lovely Stephen West
Tuesday, January 8, 2013
on the needles...
Here's what I'm currently working on:
Beloved Baby Bonnet from Jane Austen Knits Summer 2012
Baby Legwarmers (adapted from 2 patterns, this and this)
Beloved Baby Bonnet from Jane Austen Knits Summer 2012
Baby Legwarmers (adapted from 2 patterns, this and this)
I cast on 44 sts with Knit Picks Felici in color Boutique, using size US 3 needles. I decided to do a 3x1 ribbing though, like the spats pattern linked above, because I think they'll fit better. I'm not sure I'll do the stirrups on the bottom though. I'm going to make these long so they'll cover her legs completely when she's little, but she'll be able to wear them as regular legwarmers as she gets taller :)
I did the 2-at-a-time version, using some instructions from this video. Very helpful. I learned 2-at-a-time toe-up socks last year, but this was a bit different to cast on, so this tutorial was helpful. Definitely try it out. I LOVE knitting two at a time, because when you're done, you're done! Happy knitting! Let me know what you're working on right now!
Sunday, January 6, 2013
january 6, 2013
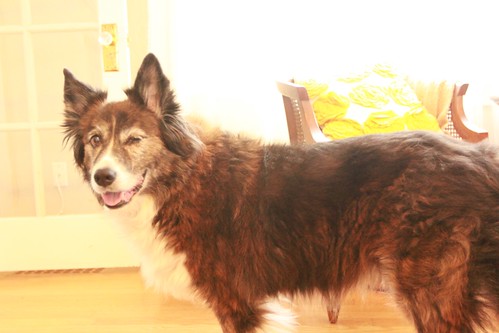
I knew she was winking at me...now I have proof, after all these years.
Saturday, January 5, 2013
Friday, January 4, 2013
collecting artwork
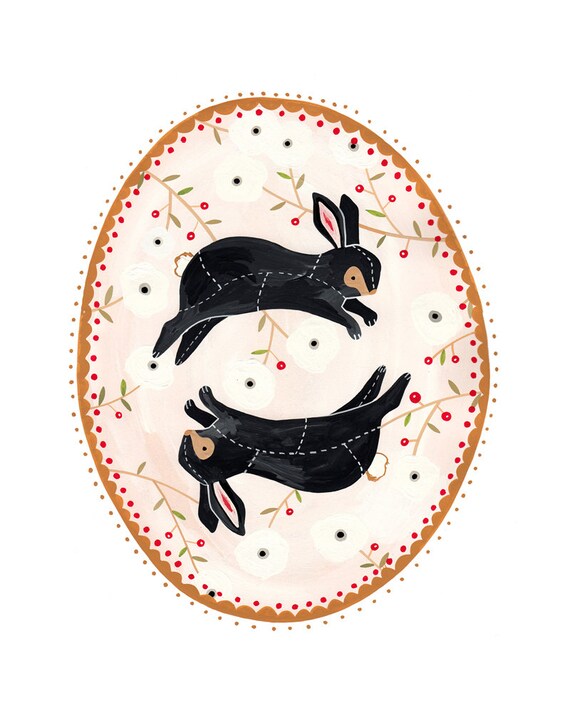
Won't this be so lovely next to the Swedish print I ordered? This is an illustration by my sweet friend Rebekka Seale. Please visit her site and buy some of her beautiful work.
I cannot wait to get this nursery together.
new yarn for baby leggings :)
I couldn't resist THESE COLORS. I'm not typically a fan of Knit Picks yarn, but how could I resist?! These will turn into precious striped leggings for Baby Bird. Now, if I could only finish a few of the things on my needles first... Yarn: Knit Picks Felici Sport Boutique
Swedish purchase for the nursery!
Eee!! I just ordered this for the nursery...I'm so excited. It's coming all the way from Sweden...I can't wait to find other prints to pair with it. Baby Bird will have lovely artwork in her room from the start. I can't think of a better way to inspire her with creativity. Yay!
Thursday, January 3, 2013
baby bird's first sweater :)
Pattern: Little Baby Sweater by Purl Bee
Yarn: Elsebeth Lavold Silky Wool in off white; Koigu KPM for grey stripes; peach is leftover sock-weight yarn
I'm so excited about finishing this little gem. This is Bird's first sweater made by mommy. Yay! Of course it will be a little big for her for a while, but I've learned never to knit anything in a newborn size anyway, so this is for around 6 months. That's when it will be cold anyway, so that works out nicely. This was such a quick knit. I forget how fast baby things knit up! It's very rewarding.
Next on the list is this adorable dress. I am trying to finish the crocheted blanket first before casting-on, but we'll see. Blankets take forever! :)
This version is by Kistrom on Ravelry. I love the colors she used. I am doing mine in the same yarn, DROPS Alpaca, but in grey with the design in yellow, I believe. Super cute. I can't wait to start, but I'm off to crochet a bit first...
To fringe or not to fringe...
Finished! Almost. I can't decide whether to add the fringe. I was set on adding it from the beginning, but now, I don't know. A friend suggested tassels and that has me intrigued. That might be really cute. Thoughts? I welcome input. Here are photos of other finished Lokkens...some have fringe.
Here is my 365 Photo Challenge photo from yesterday, by the way.
I'm taking on a fairly large project (not as easy when you're over 5 months pregnant!), but Baby Bird needed this to be painted for her room. It is such a monstrosity that the dark wood finish was just too much for what I envision to be a light, airy nursery.
This is the dresser that actually belongs in our room, but because my dear husband bought every matching piece imaginable when he purchased his bedroom set, we didn't have room for this once we made the move out here. It's a very useful piece though and we hate to get rid of it, so painting it seemed the best option. It'll be white when I'm done with it...not sure if I'll go back and sand the edges before I put the clear coat on or not...I may test that and see how it looks. Wish me luck!
By the way, my stepmom does a lot of refinishing of furniture and she recommended that I paint this with an edger (the red and white paint edger from Shur-line). It is amazing! How did I not know this before? I've only put the first coat on and it was a breeze on all of the flat surfaces. I highly recommend it, also.
Back for a post soon about what's on my needles, and what's about to be! Stay tuned :)
Wednesday, January 2, 2013
delicious goodness
These. Are the best things I've made in a looong time, possibly ever. I made the baked donuts for New Year's Day like I posted and, oh my yumminess, they are amazing. I recommend using cake flour (it's all I had, but I think it added to their light/fluffiness). Here is the recipe again and here you can buy the donut pan (which worked great!) though the recipe says they would work fine in a muffin tin, as well. The cinnamon/sugar topping just makes them, as does the nutmeg in the batter, so don't skip either of those. Please, if you don't ever make anything else I suggest, make these! Trust me :)
P.S. Because I generally try to eat grain-free, I tried a version today using almond flour (I love Honeyville Farms' because it is finely ground). They still taste ah-mazing, but due to the lack of gluten (most likely) they fall apart and instead of swirling in butter and dipping in cinnamon/sugar, I had to brush on the butter and sprinkle them with cinnamon/sugar. I will still make this version for myself, but for company I will make the original version with cake flour.
Subscribe to:
Comments (Atom)





.JPG)
.JPG)
.JPG)
.JPG)


